I've finally decided to go into some detail about my Clockwork Droid costume. The reason I never did so before is because it was very complicated, it was almost all new for me (had to construct things I never had before), and because there is a LOT to it. I'm not even really sure where to begin ...
I made this costume way back in 2009. My husband wanted to be the Tenth Doctor for Halloween, and I couldn't figure out what character to be. As you probably know by now, I like to do original costumes. Also, my husband is terrified of clowns. Of course, the answer was simple: Clockwork Droid! I wanted it to be a surprise, though, so I made the entire costume in secret. My husband had no part of any of the original construction.
Today I think I'll just start with the start of the clothing construction. For the vest and coat, I used a blue satin lining and a black stretch velvet for the outer layer. The pants were only the velvet, no lining. It should be wool or other heavy material, but I have a very high sensitivity to wool (we're talking a nasty rash), so I avoid wool at all costs. The velvet actually has a nice weight to it, but if I were to make this again, I'd use something else. It's too shiny! Ah, well, live and learn!
The vest, coat, and pants were constructed using Butterick #3072. I had to alter things quite a bit because it's a men's pattern, and also because the vest in the pattern was too long.
 |
| Vest Lining |
For the cuff of the coat, I used red velvet and two types of gold trim. I believe that all of the gold trim came from JoAnn Fabrics. Some of it came from the upholstery section. The entire thing was then sewn together to make a cuff.
Both the vest and coat have buttons. Gold buttons are insanely expensive, so I hiked over to my local craft store and purchased wooden half circles and some metallic Krylon spray paint.

The coat also has a TON of extra stuff. There's trim all down the back, the back of the arms, and the pockets. I did make pocket flaps, but no functioning pockets (there is a pocket sewn into the lining, but it makes the whole coat droop. Boo.)
The sleeve has a funky patch on it, too.
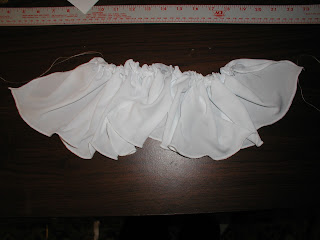
For the shirt, I just bought a men's white shirt at the thrift store and added cuffs. I made the cuffs out of white flowy material (I don't actually know what this material is, sorry - it's very light weight and kind of flutters in the breeze ... Ha.) I believe what I did was serge the bottom and then gather the top. I then sewed it to the underside of the shirt's cuff.


I apparently didn't take a ton of pictures during the midst of construction, so here are some more finished photos of the vest and coat. If I could do it again (which I can't because I glued it down), I would use cording for the red trim on the coat instead of this red ribbon which I ended up using. It's the one thing I hate about the coat, and if I could take the entire collar off and redo it, I would. Unfortunately, I had to glue a lot of stuff to both the vest and the coat, otherwise, they wouldn't sit correctly. Oy. I did handstitch all of the trim on the back of the coat - it was a nightmare, and I've actually ripped it and restitched it a few times. I've remade the vest twice now (it originally attached with hooks and eyes - it now zips up. Also, it would kind of bubble out in the middle due to the long zipper, and I actually ended up stitching in two coffee stirrers while at Dragon*Con last year - it no longer bubbles.) I've also made the pants three times, and even now they've got a safety pin in the back because they keep slipping down.
 |
| Vest | |
 |
| Vest Buttons/Trim |
 |
| Coat Buttons/Trim |
 |
| Coffee Stirrers to the Rescue! |
 |
| Coat Back |
 |
| Trim on Arms |
 |
| Pants |
 |
| Pants Trim - A plain satin ribbon |
Keep checking back - I'll post more in a few days, including the many incarnations of the mask.


No comments:
Post a Comment