Here's the costume that I had to create: Dashi Dog. She's pretty adorable!
I used Simplicity 1704 for the pattern, and it was nice and straightforward. Have I mentioned how much I love being able to just make a pattern without modifying it?
I found almost all of the materials at Hobby Lobby. I know, I know. I'm boycotting them. Except, it's hard to boycott a store when no one else in the area has the colors that you need! Yay for 40% off coupons!
 |
| Skirt with interfacing |
The skirt was a light pink broadcloth. I originally was going to put interfacing on the entire dress, but after doing that, it was like HELLO SUPER STIFF NOT AWESOME. I pulled it off of everything but the skirt, which definitely needed the extra structure.
For the top of the dress, I cut off the bottom of the tan fabric and added a pink strip. I figured it was easier than trying to lengthen the skirt.
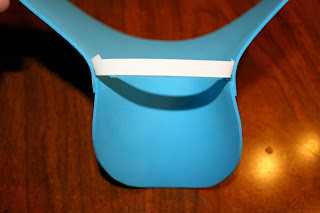
For the hat, I molded some craft foam around a measuring cup, then cut out a band from the same foam.
Those got glued together, and my husband paint a dark blue stripe around the band and the Octonauts logo on the top of the hat.
I insisted on making the hair for Dashi as well. I went through a lot of frustration over it, because it shouldn't be that hard! I made the Fruity Oaty Bar Girl heads completely out of the same fleece material! I finally ended up sewing two ears to a stretchy headband. Of course, I forgot to take any photos of it, but check it out in the final photo.
The final piece of the costume (which I almost forgot about, because I didn't know how to do it!) was the boots. My friend brought over a pair of winter boots, and I basically just covered them. Again, I used the craft foam, and I actually whipped these together in about 45 minutes.
Here are the materials that I used: one winter boot, one large piece to wrap around the top of the boot, and one piece for the toe. I figured out the shape by putting the foam around the boot and cutting until I had a basic shape, then trimming it up until it fit the way I wanted it to. The cut-out bit of the larger piece is off-center so that the ends can overlap. The pieces are designed to end right where the rubber sole starts. I was concerned about them becoming a trip hazard if they covered any more than that. The top of the covers also extend just a bit over the top of the boot.
I then put the toe piece on the boot, wrapped the large piece around, and tacked the corners of the toe piece with hot glue. I removed it from the boot and reinforced the seam a bit more.
Next, I added some elastic to the bottom of the cover. This is so that the boot can slip into the cover, but not move around once it's in place.
Finally, I added velcro so that the boots fasten on the inside of the ankles. I did this so that they looked nice and smooth when viewed from the side. Hopefully, they won't unfasten if she bumps one boot against the other. I used red velcro for that WOW effect. Okay, I used red velcro because that's all I had handy, and I didn't feel like running out to buy more when I needed a literal two inches.
Here are the finished boots!
Finally, here is a side-by-side of my niece with the original reference photo. She was quite excited to get the finished costume; there was a fair bit of jumping up and down and squeaking. I think she looks fantastic!


