 |
| Original Design |
 |
| Final Costume |
Well, I'd meant to update this as I went along, but I ran out of time (I was working on the costume until 2:30 the morning of C2E2). The problem was that I started the costume during The Worst Week in the History of America. Needless to say, not only was I glued to the computer for news, I was also cleaning up the flooding in our family room. (Luckily, we had less than an inch of water, but it was still a lot of cleanup.) So, basically, I made the majority of Shadow Weaver in a week. I actually made the dress itself twice because the original fabric I used was way too light. Also, because I was so rushed, I didn't take a lot of photos, so bear with me.
I started out with the Sassoon/Vogue 2931 pattern, which I purchased off of eBay. I couldn't find a single mermaid dress pattern in the stores!

I had to modify the bodice, as there was no real bodice. I used one of my other dress patterns to draft the top of the bodice pieces. Also, I cut the center front piece on the fold. I split the bottom and added a piece, and it just didn't work, so I'll be remaking the center front. But I'm getting ahead of myself here. I made a mockup out of muslin before making it out of the fabric, which was a Sew Classics Tango Red Jet Set fabric. (I had originally used something a bit more stretchy, but it wasn't heavy enough to drape the way I wanted it to.)

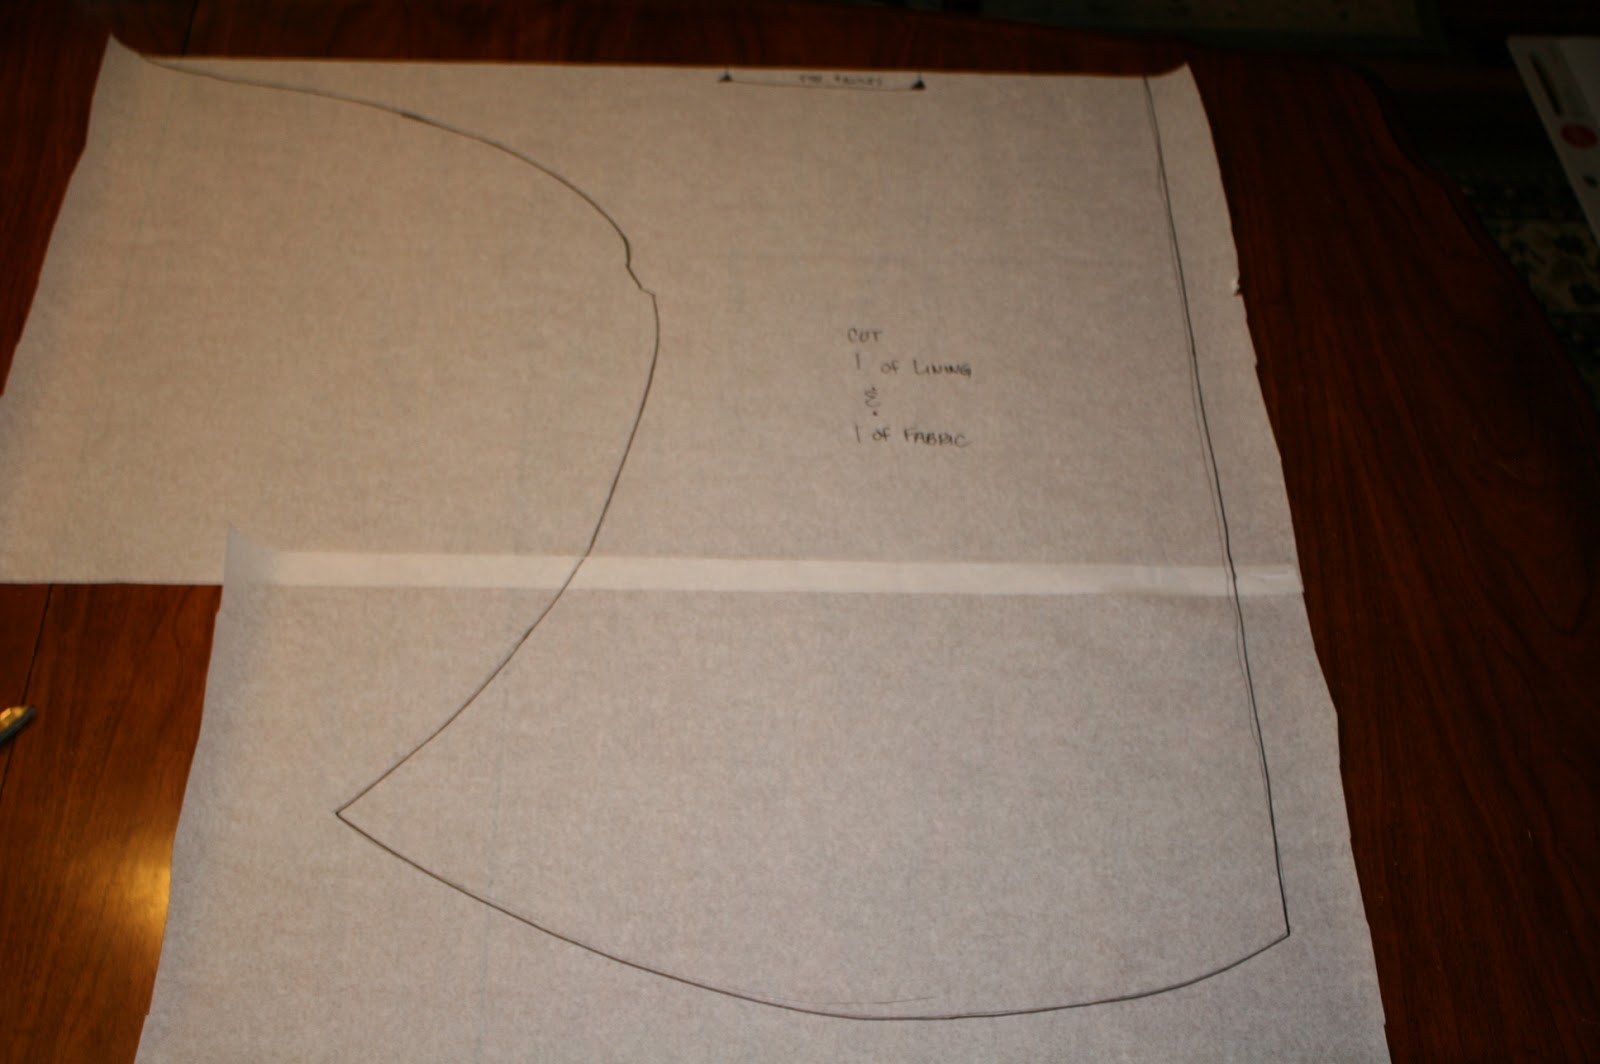
I then drafted the sleeves (or, as I call them, the "wings") to be cut on the fold, then cut out two linings and two fabrics, then sewed one lining to one fabric and then turned them inside out.

After piecing the wings together, I had to attach them to the arms. This was a bit trickier than I'd expected, and I should have cut the wings with the fold on the top of the arms, not the middle. I ended up having to make two cuts in one piece (I hadn't sewed the two pieces together yet). I managed to then sew it onto the armholes and then patch up the back so that you couldn't see the cuts I'd made in the wing. It looked like a drunk monkey made it, but you can't tell at all now. After that, I sewed the front and back wings together at the top. Did I mention what a bad idea that was?

So here we are almost at the end of construction. Sorry about that. I needed to have a ton of tulle to make the skirt stick out so I looked like I was floating. I bought 5 yards of the double-wide tulle just to start out with. The lady at JoAnn's was like, "wow, 5 yards of double-wide tulle is MORE than enough!" Aw, you're so adorable, JoAnn's lady! I ended up putting about 20 yards of tulle in this thing total. SO MUCH TULLE!
 |
| Five yards of tulle |
And I will be adding more because I had to cut so much off so that I wouldn't trip that it decreased the poofiness. More in the front, more in the back.

Look how poofy!!! Unfortunately, I had to cut quite a bit of it off to prevent me from tripping on it, and to prevent other people from stepping on it. I was stepped on quite a bit as it was. Sometimes you have to sacrifice accuracy for practicality. Sad face.

I had to make green arms, and I was going to use the method that the girl who made the Weeping Angel described here. However, she must be an incredibly talented person, because I tried four times and never once did I cut the fingers out correctly. So, I turned to another source. I ended up buying this nylon opera-length glove in the color Celedon. I don't know what Celedon is, but it sounds Elvish to me. It shipped super fast and was the perfect color of green, even though it looks gray in this photo. I then purchased long fashion nails from CVS, trimmed them into points, filed them a little, and painted them black (using black paint). I then hot-glued them onto the gloves (will I never learn?) They were perfect until three of the nails on the right hand fell off at the con. Oops. Next time, I'll use E6000.


The final thing was to make the hood. It. Was. A. Nightmare. I tried a bunch of things, and then finally, my husband suggested armature wire. Here are a few shots of the final construction of the form. Oh, after some consideration, we also added some foam to the top of the form like a cap, just for support. I put batting on top of that to smooth it out, and that also poofed the hood out enough that I didn't have to add any stuffing to the "tail".


This was the pattern I drafted for the hood fabric. I started with the pattern from Simplicity 5840 and extended the bottom and tail, plus added a slight flair. It was actually one of the first things I drafted and cut out. I wasn't drafting patterns at 11:30 the night before a con.

So then, I glued two layers of chiffon to the form. I know, glue. But I was running out of time. Actually, when I remake it, I'll probably use glue again. It worked out pretty well.

I then put the hood on and draped a lower face mask over the bottom. That was glued to the middle wire of the hood form. I then attached it to the back of the hood and sewed it together (it's very difficult to sew something that's already attached to a wire form, but I had no other choice.) My husband had to help me put it on and then glue (ARGH) velcro to the top of the dress and the underside of the hood to make it drape correctly.
 |
| This is what my machine looks like at 2:00 am. |
The final thing was to add eyes made out of reflective tape. They're orange when you take a normal photo, but when you use a flash, they glow! It's fantastic, and another ingenious idea from my husband.
Oh, I almost forgot about the belt! My wonderful husband (have I mentioned yet how great he's been?) made this for me when he realized I was beginning to panic about getting the costume finished. It is gorgeously detailed, and while the front part is perfect, the belt part itself is a little wide, so I'll be remaking that as well. Also, the glue (DAMN YOU, GLUE!) popped off of the metal support within about 10 minutes of putting it on at the con, so the majority of my photos have shiny metal showing through.

And here's the final product. These photos are courtesy of my coworker, Lulette, who joined me at C2E2 for a bit. I have very mixed feelings about how this turned out. I still kind of feel like a bunch of crazed monkeys made it, but I have to remember that I drafted a majority of it myself, so I couldn't simply attach one piece to another and know it would work. Also, making a costume from a cartoon is incredibly difficult; every reference shot I have has different proportions. In some the sleeves have three "flames" on each side, and in some they have four. In some shots, the sleeves nearly touch the ground, and in some, they're very short. I will be remaking several aspects of the costume, including adding elastic to the sleeves so that the seam doesn't droop down off of the top of my arm (like I said, I should have made the seam on the back of the wings, not the top!) I also need to bring the top of the hood lower so it doesn't look like I have a Chevy bumper forehead.
However, I was very pleased with the reception I received at C2E2. It was almost as popular as my Clockwork Droid costume! So I guess it's an acceptable cosplay, especially considering that it was constructed in a week ...


Hey. I am wondering if you would consider renting this costume out for this Halloween?
ReplyDeleteHey. I am wondering if you would consider renting this costume out for this Halloween?
ReplyDeleteHow do you manage to see while wearing the costume?
ReplyDeleteBelieve it or not, I can actually see pretty well out of the chiffon! It takes some getting used to, but it's kind of like looking through a screen.
DeleteAmei sua fantasia. Fichou show !!!! Muito TOP
ReplyDelete